
Client Manager
With Ornavi you can build and manage a sophisticated list of all your Clients and contacts. Not only does the Client Manager act as a hub for crucial contact information, it also provides the tools to link customers to jobs and prospects giving you complete traceability.
The Client Folder
Every Client added to the system has their own Client Folder with three tabs of information.
![]() To access a Client Folder first open the Client Manager from the Clients drop down of the main menu. On the right hand side you will notice an Options column. Click the View Icon to open the folder.
To access a Client Folder first open the Client Manager from the Clients drop down of the main menu. On the right hand side you will notice an Options column. Click the View Icon to open the folder.
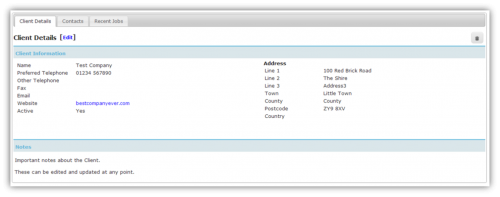
The Client Details Tab displays the main contact information about the customer. It also shows any notes that have been recorded.
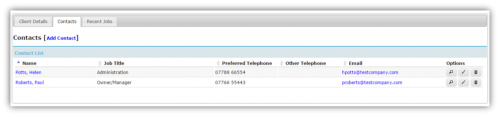
The Contacts tab displays the contact information for additional people associated with the client.
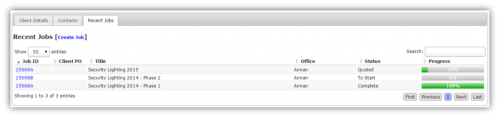
The Recent Jobs tab is a list of all jobs associated with the client.
Add a Client
On the Main Menu bar, click on Add Client from the Client tab to bring up the new client entry form. You have the option to add the client as a Business or a Consumer. As you will see that each will give you slightly different fields to work with :
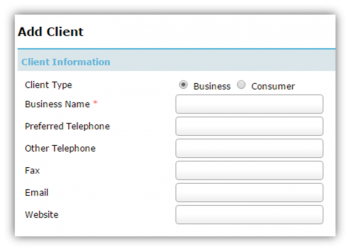
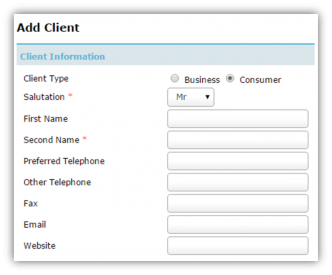
You will notice that Salutation & Surname or Business Name are the only required fields. This allows new customers to be added quickly but it is advisable that in normal circumstances, as much information as possible should be entered every time you add a new client.
The Notes field allows you to record any information you need to about the client.
When you are done, press Submit to finish adding the client.
Edit a Client
![]() Navigate to the main view of the Client Manager. You will notice the Options column on the right hand side. Click the Edit button (looks like a pencil) to edit any details about the client.
Navigate to the main view of the Client Manager. You will notice the Options column on the right hand side. Click the Edit button (looks like a pencil) to edit any details about the client.
![]()
Alternatively you can edit a client from within the client folder. At the top of the Client Details tab click the Edit link to the right of the title.
Always click submit when you are finished to save your changes.
Delete a Client
![]()
Navigate to the main view of the Client Manager. You will notice the Options column on the right hand side. Click the Delete button to delete the client and any associated contacts. Another Delete button can be found in the Client Details tab of the Client Folder (right hand side).
Deleting a client cannot be undone.
Client Contacts
You may have more than one point of contact for a client, and these can be recorded in the Contacts tab of the Client folder.
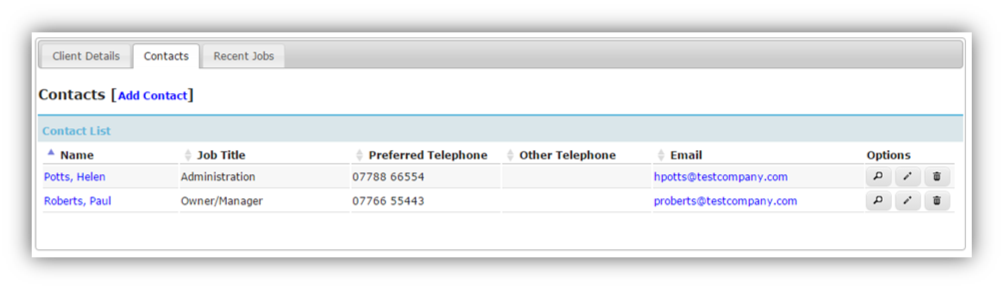
To add a contact for a client, navigate to the Contacts tab and click the [Add Contact] link.
Merge Client Contacts

The merge tool allows you to merge duplicate contacts. Open the Contacts tab of an client, click on the name you would like to merge with another contact (i.e. the one you would like to remove). Click [Merge] at the top of the tab. Then select the contact you would like to merge it with from the drop down list (i.e. the one you would like to see displayed instead). Click Submit to confirm.
Recent Jobs
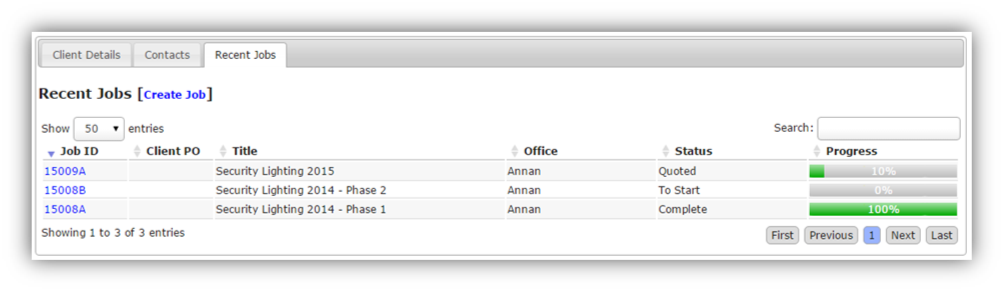
The Recent Jobs tab is a list of all jobs that have ever been carried out for the client. The list can be ordered by any column by clicking on the arrow beside the heading. Use the navigation buttons at the bottom or the search box to find a particular job in longer lists.To open a job folder, click on the Job ID.
You can also create a job for this client by clicking [Create Job] at the top. By doing this, the client field will already be filled out in the next screen.