
File Storage
Any documentation, in any format can be uploaded and stored in Ornavi in the Files tab of any job folder. Storing items such as delivery notes, supplier quotes or warranty certificates in the “Ornavi Cloud” means you don’t have to worry about back ups and data storage security. You will also have access to these files from anywhere, at any time.
The Files Tab can be found near the end of the tab options in any job folder:

Uploading Files
Upload from a PC
Open the job folder and navigate to the Files tab. If your file is to be stored within a specific folder then first click on the folder. Once you are in the location you would like the file to be uploaded to then click on the [Upload Files] link at the top of the tab.
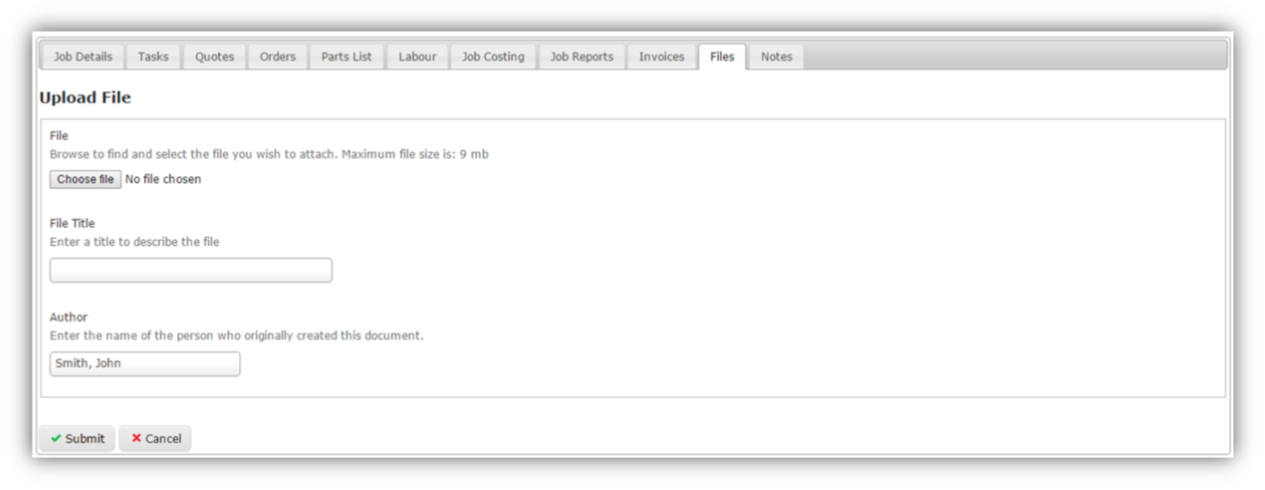
Click Submit to finish uploading your file(s).
Upload from a Smart Device
If you have a smart phone or tablet you will have the option to open your camera roll or access the camera. Opening the camera roll will allow you to select from the Upload tool to take photographs and save them to Ornavi. This means paper certificates etc. can be photographed and uploaded without the need for scanning them onto your PC first.
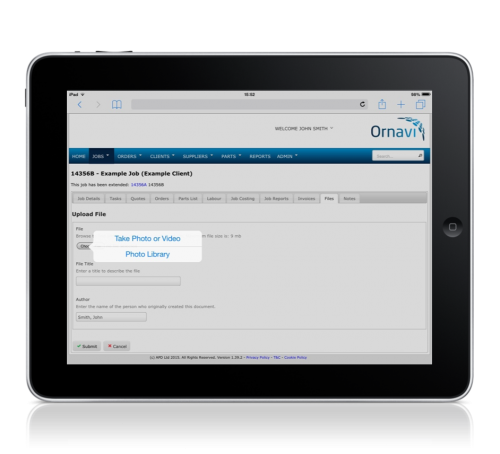
Open the job folder and navigate to the Files tab. If your file is to be stored within a specific folder then first click on the folder. Once you are in the location you would like the file to be uploaded to then click on the [Upload Files] link at the top of the tab.
Click Submit to finish uploading your file(s).
Open a File
![]() On the file tab main view, notice the Options column on the right hand side. Here you will see a View icon that looks like a magnifying glass. Click to open the file.
On the file tab main view, notice the Options column on the right hand side. Here you will see a View icon that looks like a magnifying glass. Click to open the file.
Delete a File
![]() On the file tab main view, notice the Options column on the right hand side. Here you will see a Delete icon that looks like a rubbish bin. Click to delete the file. This cannot be undone.
On the file tab main view, notice the Options column on the right hand side. Here you will see a Delete icon that looks like a rubbish bin. Click to delete the file. This cannot be undone.
File Folders
Use the File Folders to better organise your files. For every job created there are four default folders:
- Client Files
- Company Files
- Supplier Files
- Photos
You can edit the names of the folders on a per job basis (see below) or you can edit the default folders available for all jobs from Admin > System Settings > Customisations.
Create a Folder
On the file tab main view, click the option to [Create Folder] next to the Upload options.

Simply name your folder and click Submit. If you wish to add files to a specific folder, be sure to open the correct folder first. Files cannot be moved folder at this time.
Edit a Folder
![]() On the file tab main view, notice the Options column on the right hand side. Here you will see an Edit icon that looks like a magnifying glass. Click to edit the name of the folder.
On the file tab main view, notice the Options column on the right hand side. Here you will see an Edit icon that looks like a magnifying glass. Click to edit the name of the folder.
Delete a Folder
![]() On the file tab main view, notice the Options column on the right hand side. Here you will see a Delete icon that looks like a rubbish bin. Click to delete the folder and all of its contents. This cannot be undone.
On the file tab main view, notice the Options column on the right hand side. Here you will see a Delete icon that looks like a rubbish bin. Click to delete the folder and all of its contents. This cannot be undone.