
Get Started Guide
Welcome to the Quick Start Guide. This guide is designed to show you how to get started with Ornavi quickly and easily. Navigate the guide by scrolling down the page or use the menu options on the left hand side to jump to a different section. For more in depth information on anything covered in this guide then please click through the options on the left hand side.
Log In
To access Ornavi, simply open any web browser and go to my.ornavi.com
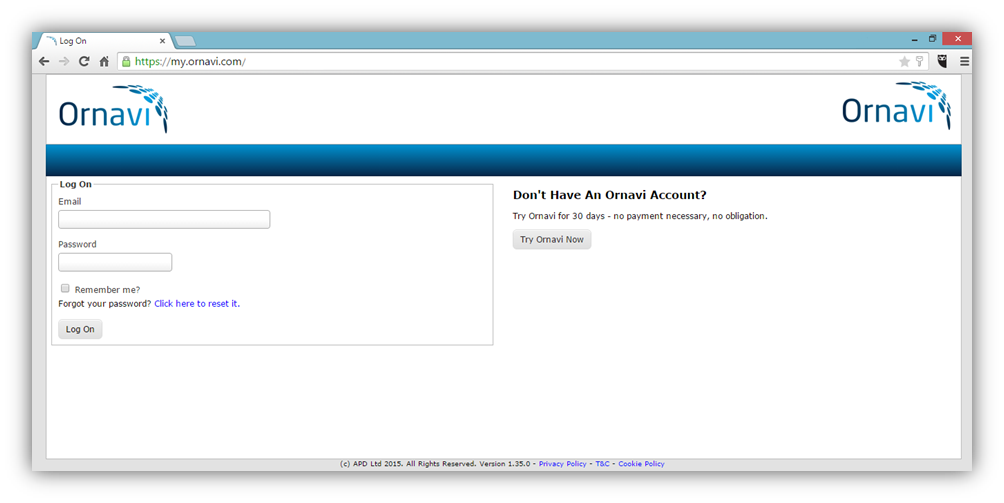
To log in you will need your email address and your password. This is the same email address and password used to sign up to Ornavi.
To speed up this process in the future we suggest bookmarking the page or creating a shortcut from your desktop. If you are unsure how to do this, visit your browser help menu.
Homepage
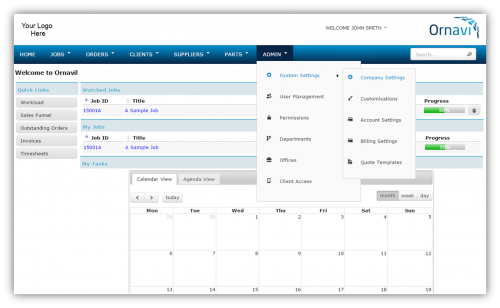
Once you are logged in you will see the Homepage: a hub of information and shortcuts that gives users access to crucial workload information as soon as they open the system. It’s designed to help everyone better understand their assignment priorities. Let’s explore a bit more.
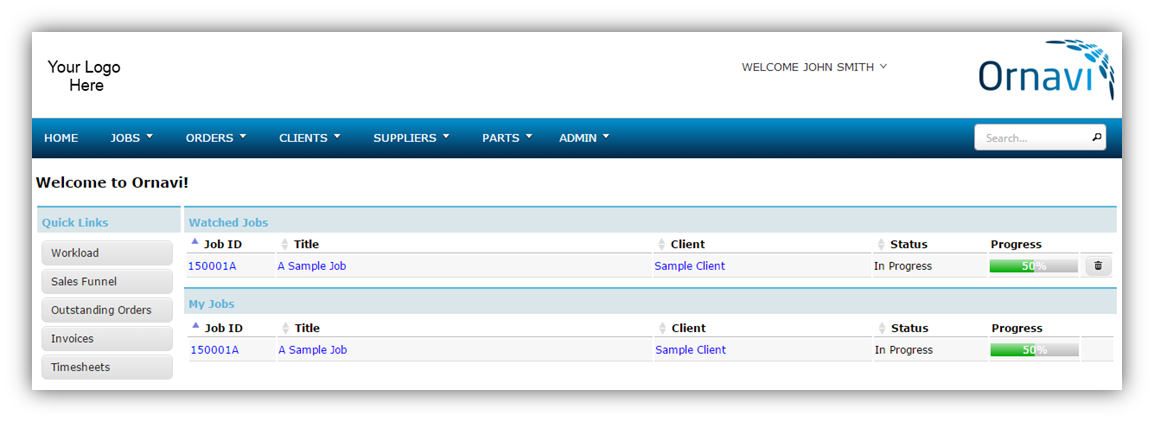
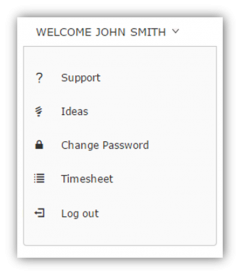
Ornavi includes unlimited users on every account and the homepage is unique to the user that’s signed in. You can always check who is logged in by looking at the user menu next to the Ornavi logo. It should currently say “Welcome Your Name“. Clicking on the arrow opens the User Menu.
From here users have the option to visit the Support section, put forward an Idea for review, change their password, update a Timesheet or Log Out.

The dark blue bar is the Main Menu Bar and contains links to every section of Ornavi. On the far right is the Global Search. This will search through your entire Ornavi database, meaning you can find specific information from even the smallest of clues. You need a minimum of three characters to search.
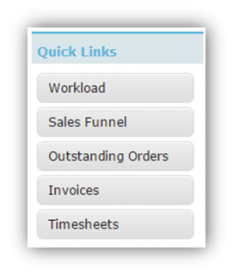
The Quick Links on the left hand side provide short cuts into some of the most frequently visited reports and tools in Ornavi. For more information about each of these, see the main Help Guide.
Set Up Your Company
First of all we will configure your company details in the Admin menu. This will only take a few minutes.
Expand System Settings from the Admin menu and then click on Company Settings.
From here you can add and edit your company details and set some preferences.
Company Information
You should see the information you entered when you registered for your free Ornavi trial. Add any missing information. The Year End Date dictates how financial graphs display on the Homepage.
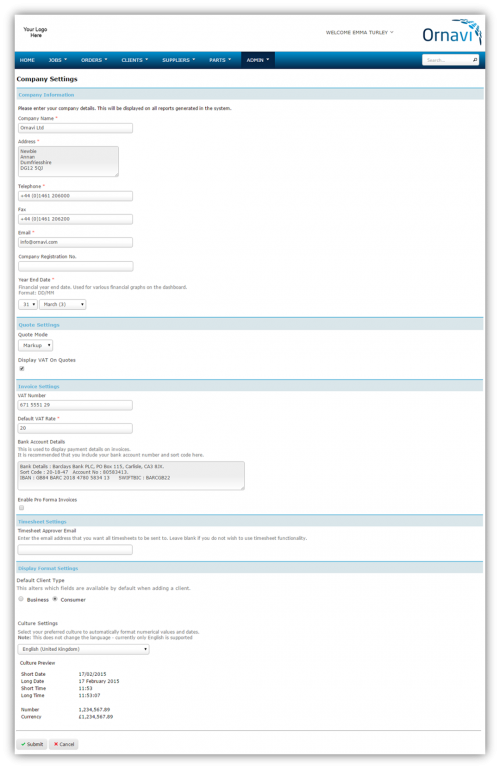
Quote Settings
Ornavi has two modes for Quote creation; Mark-Up or Discount. Mark-Up mode uses cost prices and mark-ups. Discount mode uses list prices and discounts. It is recommended that you select your preference before creating any quotes. You can switch mode at any point but any quotes created previously will remain on the previous setting.
Invoice Settings
To ensure your Invoices will be generated correctly, fill out the Invoice Settings. The bank details are for your client’s use and are displayed on all invoices generated with Ornavi. To enable Pro-Forma Invoices, check the box.
Timesheet Settings
To enable Timesheets you must enter an email address in Timesheet Settings. An email notification will be sent to this address every time a new timesheet is submitted.
Display Format Settings
Clients can be added to Ornavi either as a Business or an Individual. Pick your Default Client Type – this should be based on whether you a predominantly a B2B or B2C company. Users will still have the option to select either when adding a client.
Select your preferred Display Format. The default is English (United Kingdom). The Display Format alters times, dates and currency throughout the system.
Now click on Customisations by expanding System Settings from the Admin menu. This section will allow you to make changes to the way Ornavi looks. These settings are global, which means any changes will be applied for all users you have in the system.
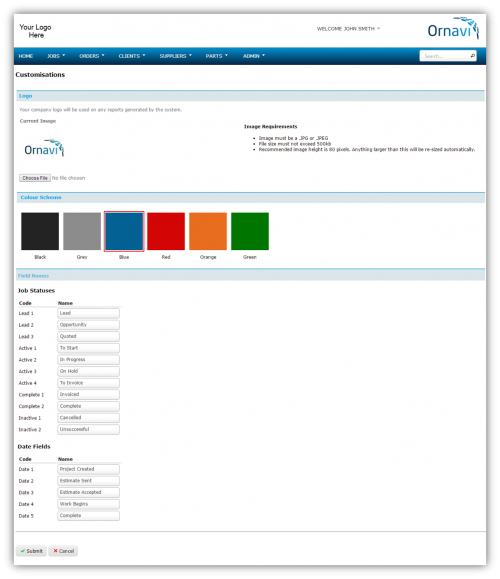
Logo
If you have a company logo click Choose File to upload it now. If you have issues uploading a logo check the image requirements. The logo will be displayed on the top left of every page and on any documents created with Ornavi.
Colour Scheme
Select your preferred colour scheme.
Field Names
Some fields can be renamed to suit the terms used within your company. You may want to return to this once you become more familiar with the system and have learned more about how these fields are used.
For a more in-depth explanation of how these fields work click here.
Set Up Departments & Users
Setting up Departments is useful when you employ people with different roles and pay rates. You must have at least one department in the system. If you don’t create one, the system will use the default “Department A”. To set up your own departments open the Admin menu and then click Departments.
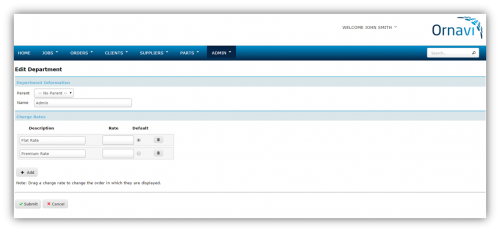
You will notice that an example department has been set up called Department A. Click on the pencil icon to edit. From here you can rename the Department and add any charge rates.
After you click submit you can continue to add more departments if necessary.
“Parent” is used to set up sub-departments. Simply select which department you want the new one to be part of using the Parent drop down.
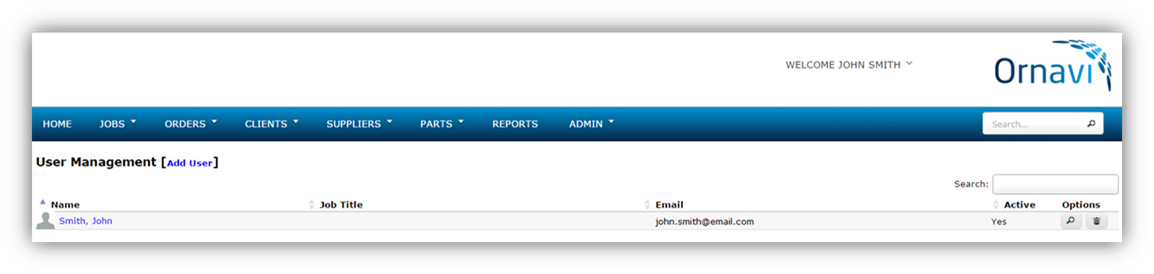
Next you will need to add some more users to the system. It’s important to ensure all employees have their own login for Ornavi for assigning tasks and recording labour. Click User Management from Admin on the main menu bar.
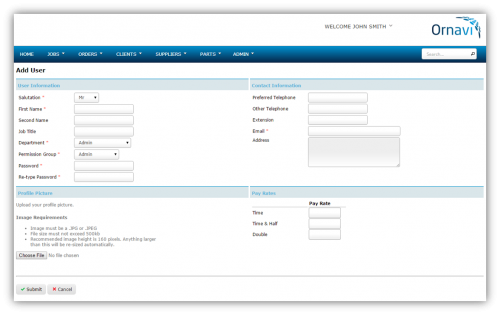
For each user enter their information, pay rates and profile picture.
Permission Groups are the built-in security tool that limit a user’s access to certain information. The default permission group is Admin. For details on how to configure permission settings visit the Permissions help guide.
Once you click Submit you will see a summary of the new user. Repeat these steps to continue adding users to the system.
Add A Client
Ornavi exists to help you improve record keeping and reduce gaps in your information so to ensure traceability, you must add the client before you can create a job.
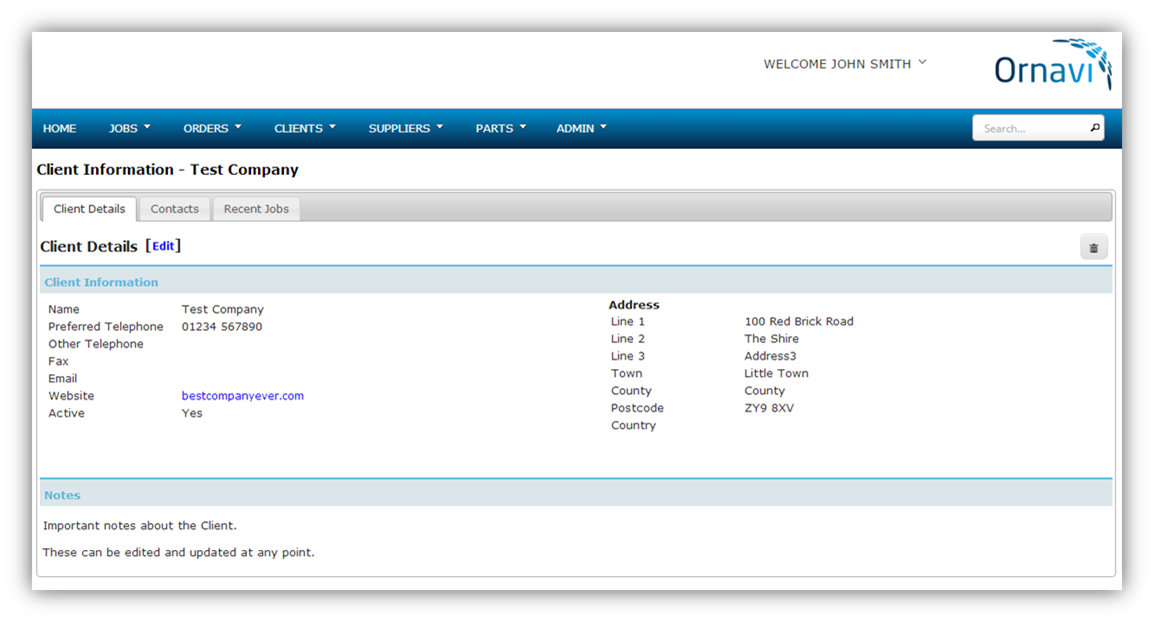
Click on Add Client from the Client tab on the main menu bar to bring up the new client entry form.

For each client, fill out as many fields as possible. It’s up to you at this point if you wish to start entering real information or continue with test data. Hit Submit.
Note: You will notice that Name is the only compulsory field. This allows new customers to be added quickly – you can add the extra detail later if you are in a hurry.
You can now add contacts by clicking on the Contacts tab. This is useful if there is more than one of point of contact for a client. Where this is particularly handy is when your client is a business.
You also have the option to view the work you have completed for this client by clicking on Recent Jobs. This will currently be empty but if you revisit this tab in the future and you will see a list of all work carried out for this client.
Create A Job
Now let’s take a look at what is involved in creating your first job with Ornavi. We will cover the basics but for more detailed information see The Job Folder section of the Help Menu.
Click on Create Job from the Jobs drop down on the main menu bar. Again you can choose whether to proceed with test data or an actual job.
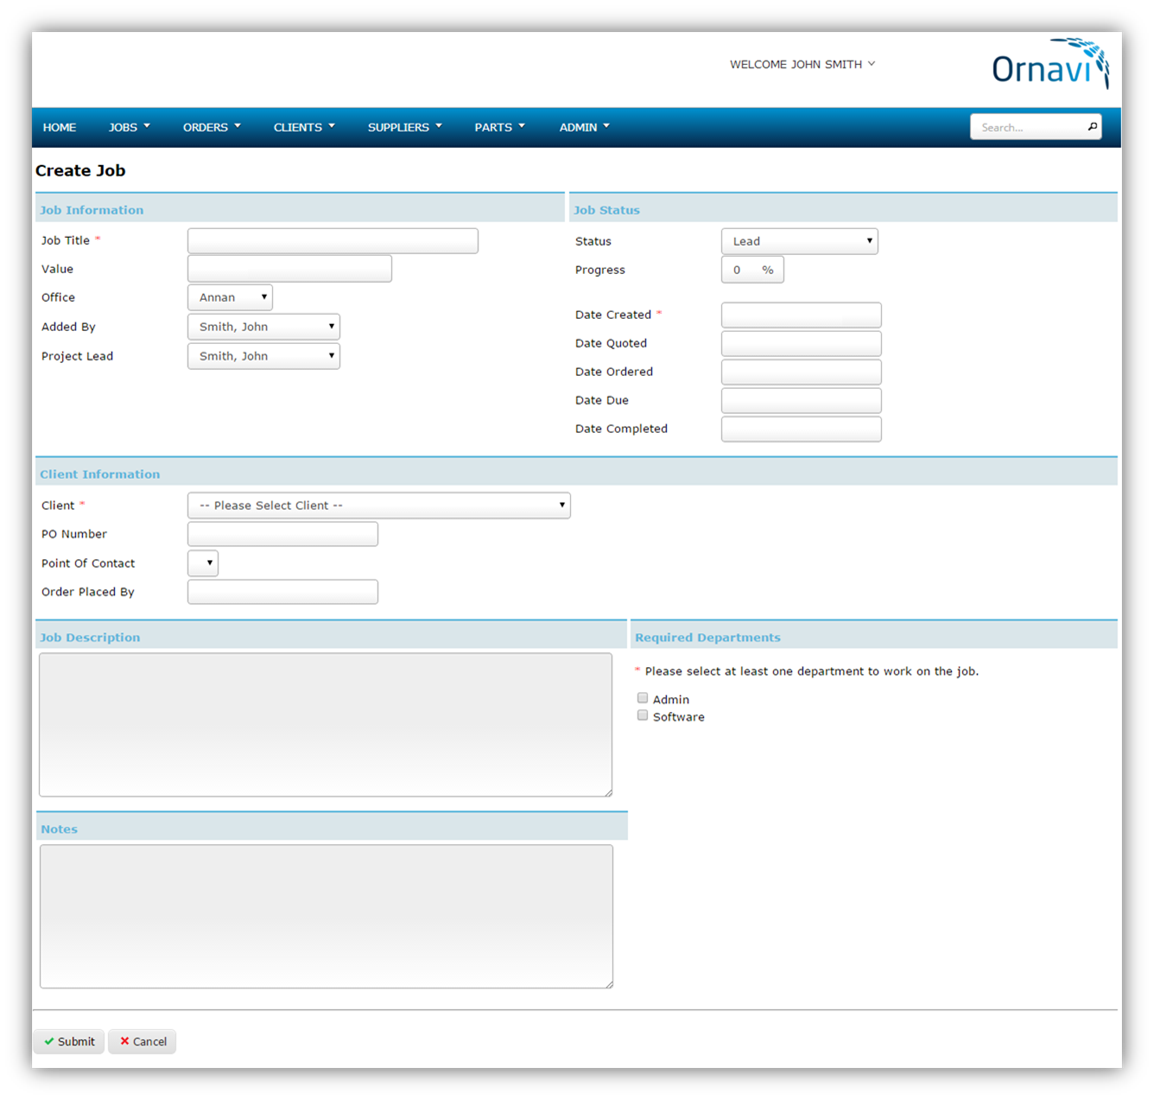
Job Information
First give your job a short descriptive title. This should be something fairly short and recognisable. The title will appear frequently in lists, searches and reports.
 The Value field is used to generate the Job Costing Report so should be filled out once the value is known.
The Added By field automatically fills out with the name of the user currently logged in but can be edited.
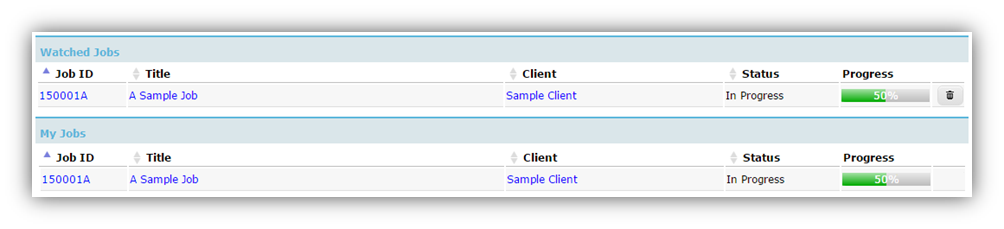
Every job in Ornavi requires a Project Lead. This field is automatically filled out with the name of the user currently logged in but can be edited. The user selected for this field will then see this job appear on their homepage under My Jobs.
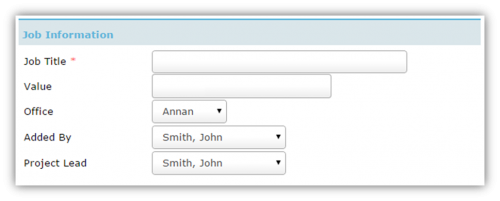
Job Status
Use the Status drop down list to keep track of the progress of all your jobs from start to finish. Find out how to customise your status options here. Progress is another tool used for monitoring a job as it advances. Enter any value from 0-100.
The only required date field is the first one, entitled Date Created by default (you may have renamed this in Admin). This field will always fill out automatically when it is first created with the current date but it can be changed using the pop up calendar. Fill out any other date fields as necessary.
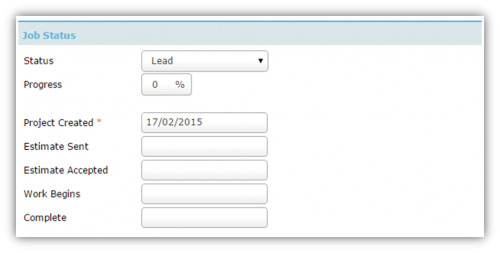
Client Information
Select a Client from drop down list. If available, other information can be entered at this point such as Point of Contact, PO Number and a name for Order Placed By if different from the Point of Contact.
Job Description & Notes
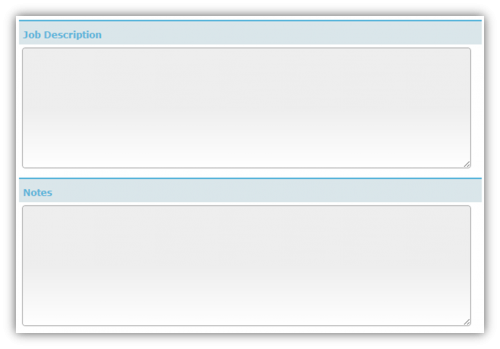
The Job Description field is for recording what the job involves. The text entered here is used again when creating a quote (but can be edited).
The Notes box is for any other useful information about the job.
Departments
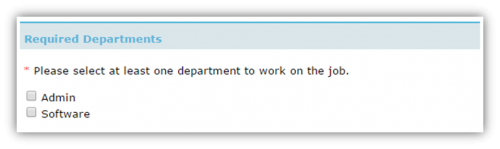 Tick which Departments are required to complete the job. If have not set up additional departments then select the default Department A (this can be renamed).
When you are done, click Submit.
The Job Folder
You have successfully created your first Job Folder! Each job in the system is allocated it’s own folder and unique ID. Everything related to the job will now be linked to the unique ID and will be stored in the Job Folder.
The default format for the Job ID is YYXXXXA. YY is the year it was created, XXXX is a numerical increment starting from 0001. The letter is used when a job is to be extended starting from A. Eg. 150001A. You can change the format of Job ID’s by contacting us.
Job Details Tab
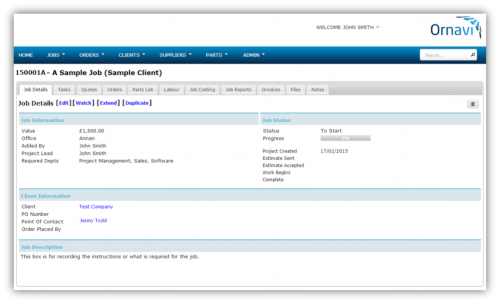
The first tab of any Job Folder is Job Details. This is where you can find and update all the important information about the job including key dates, key contacts and the job description. You will also be able to see at a glance the status of the job and how it is progressing.
From here, users with the correct permissions can do several things:
![]() A job can be deleted using the button on the top right of the job folder but this should only be used if the job was added in error and as a last resort because it cannot be undone. Instead a job should be marked inactive using the status options as this does not remove it from your historical data.
A job can be deleted using the button on the top right of the job folder but this should only be used if the job was added in error and as a last resort because it cannot be undone. Instead a job should be marked inactive using the status options as this does not remove it from your historical data.
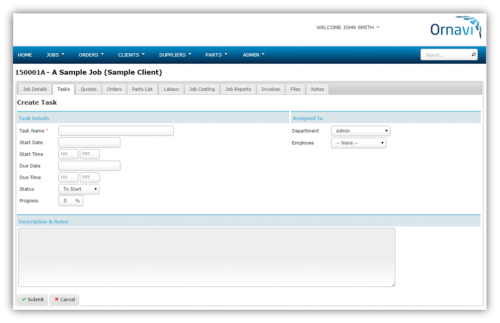
Next along is the Tasks tab. You can break down your projects into smaller steps and assign these to your employees. All tasks for a job will be listed in this tab.
You can create a task by clicking [Create Task]. When a task is created, it can be assigned to a department, yourself or another user who will receive an email alert.
Quotes Tab
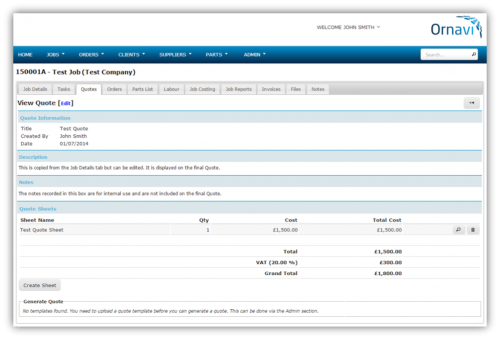
The Quotes tab is where you can create (multiple) quotes for the client. It has been designed to be as flexible as possible. You can create quotes from scratch or input parts straight from the inventory.
When the quote is ready, generate a PDF from your own template, complete with your company logo.
You can also turn quoted labour and parts into Tasks and Purchase Orders.
Orders Tab
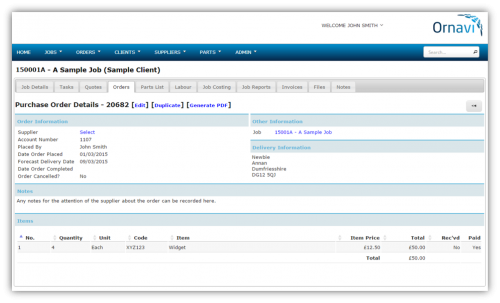
Clicking the Orders tab will show a list of all purchase orders created for the job. You can easily create a new purchase order by clicking [Create Purchase Order].
Every order is allocated a unique ID, which is also linked to the job. This gives you complete peace of mind that no purchase order can go missing. You can also create an order via the Main Menu bar.
Parts List Tab
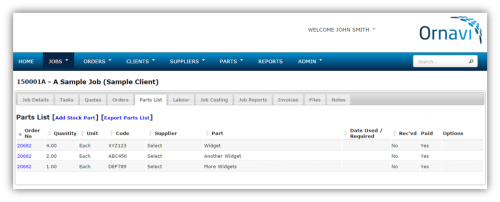 The Parts List tab is an automatically generated list of all the parts that have been ordered for the job. This list can be exported to a CSV file and can be used in a number of ways including for user manuals or documentation.
Labour Tab
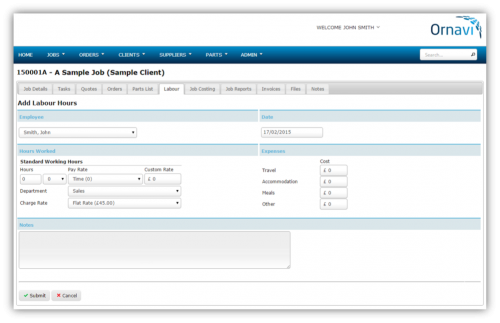
The Labour tab gives users the ability to record the time spent on a job. All labour is logged against the correct job alongside the applicable pay and charge rates. The information is used to create an accurate Job Costing report.
Note: Labour can also be added to a job via Timesheets.
Job Costing Tab
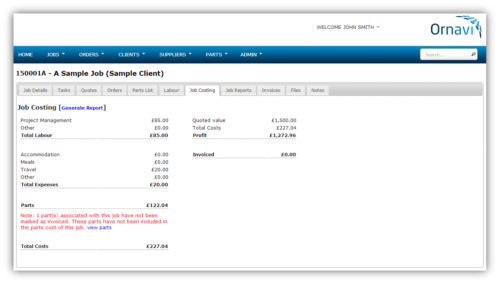 Based on information gathered from other tabs users with the correct permissions will have access to an automatically generated Job Costing report.
As labour is added and parts are paid for the information in this tab automatically updates. This quick report can be used for a summary of the income, costs and profit/loss for the job as well pricing similar and repeat work.
Job Reports Tab
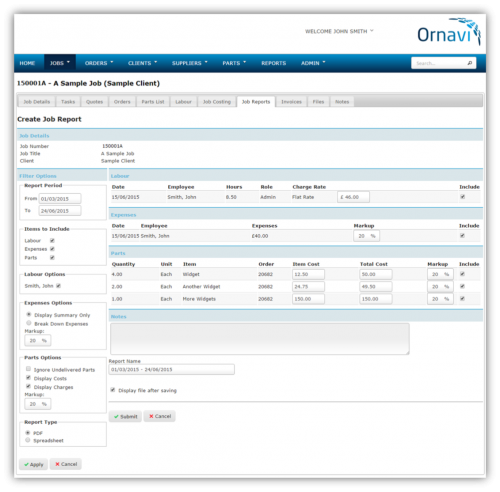
With the Job Reports tab you can create detailed reports on materials, labour and expenses. These are useful for attaching to invoices for providing the customer with a full breakdown of their costs.
Various filters can be used for flexible reporting and the report can be saved as a PDF or CSV file, complete with your company logo.
Invoice Tab
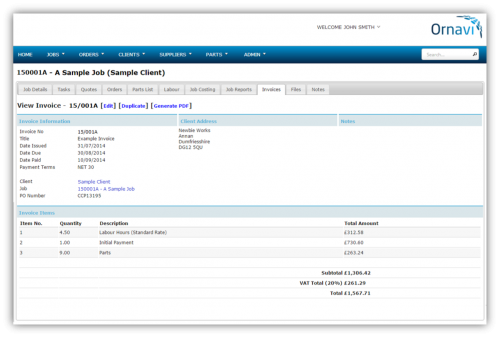
The Invoice tab is where you can create professional invoices quickly and easily. Create invoices from scratch or extract the information from your quotes and purchase orders to generate a PDF complete with your company details and logo.
Files Tab
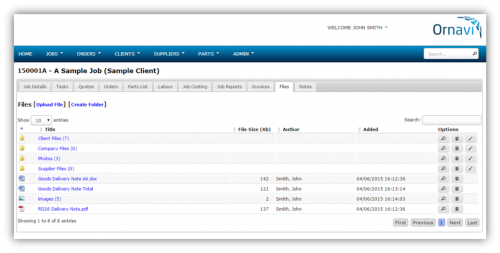 Ornavi comes with built-in storage capabilities. Any file, in any format can be uploaded and stored in a job folder.
When using a smart device, photographs can be taken and uploaded straight into Ornavi, eradicating the need for scanning.
Notes Tab
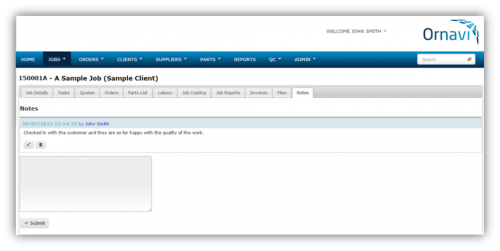
The final tab of the job folder is the Notes tab. Multiple notes can be added to the job and each one is date and time stamped along with name of the author.
Notes can be edited and deleted by users with the correct permissions.
![]()
Congratulations, you have now completed the Quick Start Guide. There are some other settings we would recommend configuring early on. Please visit the Settings section of the Help Menu for more information.