Settings
All the Ornavi settings can be configured via the Admin menu which is accessed from the main menu bar. Opening the drop down gives access to a range of Administrative pages, some of which should be configured before using Ornavi properly.
Company Settings
The Company Settings can be accessed by expanding the System Settings menu. From here you can add and edit various details about your company.
Company Information
These details are automatically used when generating some documents (e.g. Purchase Orders) and for the Office Details too. To edit the Office Details click on Admin and then Offices.
The Year End Date dictates how the financial graphs display on the Homepage.
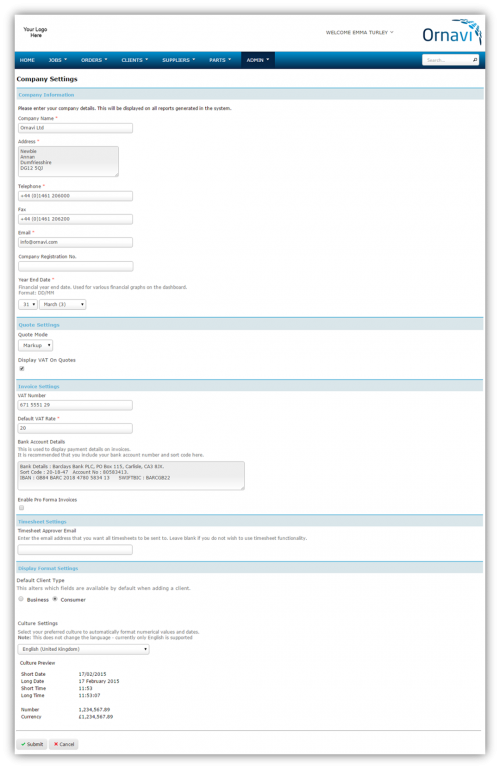 Quote Settings
Ornavi has two options for Quote creation; Mark-Up and Discount. Mark-Up mode uses cost prices and mark-ups, Discount mode uses list prices and discounts. It is recommended that you select your preference before any quotes are created. You can switch mode at any point, but any quotes created previously will remain on the previous setting.
Invoices Settings
Once configured, this information will appear on any invoices created. Ornavi can handle Pro-Forma Invoices. To enable Pro-Forma Invoices, check the box. To disable them at any point, return to this page and uncheck the box.
Timesheet Settings
To enable Timesheets you must enter an email address. An email notification will be sent to this address every time a new timesheet is submitted.
Display Format Settings
Clients can be added to Ornavi either as a Business or an Individual. Pick your Default Client Type – this should be based on whether you a predominantly a B2B or B2C company. Users will still have the option to select either when adding a client.
Select your prefered Display Format. The default is English (United Kingdom). The Display Format alters times, dates and currency throughout the system. It will not change the language – currently only English is supported.
Click Submit to save any changes.
Customisations
Customisations is accessible by expanding System Settings from the Admin menu. This section will allow you to make some changes to the way some parts of Ornavi look. These settings are global, which means any changes will be applied for all users you have in the system.
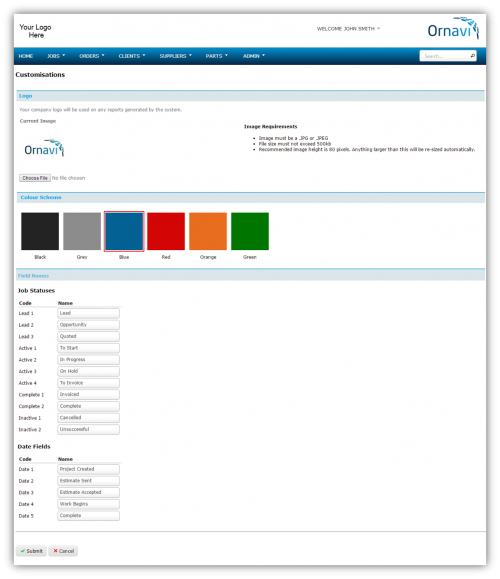
Logo
If you have a company logo click Choose File to upload it now. If you have issues uploading a logo check the image requirements. The logo will be displayed on the top left of every page and on any documents created with Ornavi.
Colour Scheme
Select your preferred colour scheme. Please contact us If you would like an alternative colour.
Field Names
Certain fields within Ornavi can be renamed. The fields have default names which can be edited to suit the terms used within your business. This is explained in more detail below.
Job Statuses:
Lead 1, Lead 2 and Lead 3 represent the Sales Funnel and can be used for tracking the process of nurturing a possible job into an actual job. When a job is assigned a Lead status, you cannot create any purchase orders or record any labour. This prevents jobs that are not yet live/active accruing any costs. Jobs with a lead status are visible on the Sales Funnel page and on the dashboard under Sales Funnel Overview.
Active 1, Active 2, Active 3 and Active 4 represent your current workload and are used for managing your projects through to completion. When a job is assigned an Active status all options within the job folder are available. Jobs with an active status are visible on the Workload page and on the dashboard under Workload Overview.
Complete 1 and Complete 2 represent the work that has been completed. Once a job is allocated a complete status, it essentially becomes locked so it can no longer accrue costs. Users will be unable to create purchase orders or add labour to it. To grant a user the ability to make further amendments to jobs with a complete status they must be give the “Edit Inactive Jobs” permission. See XXXXX to learn how to edit permissions.
Inactive 1 and Inactive 2 represent work that was never completed but has become obsolete. A job with an inactive status is removed from all the main reports and workload lists but can these jobs can still be found via Job Search (under the Jobs drop down of the main menu bar) and Global Search.
Date Fields:
Date 1 is automatically filled out when a job is created (or extended/duplicated) but can easily be edited by clicking on the field to bring up the pop up calendar. It can still be renamed if required.
Date 2, Date 3, Date 4 and Date 5 are used to track specific milestone dates that occur throughout the project lifestyle. They are given names by default and to give examples of how they can be used but edit the labels to suit. These dates are used to generate various reports throughout the system.
Offices
Ornavi can be configured to support multiple offices. To access the offices page, open the Admin menu and click Offices.
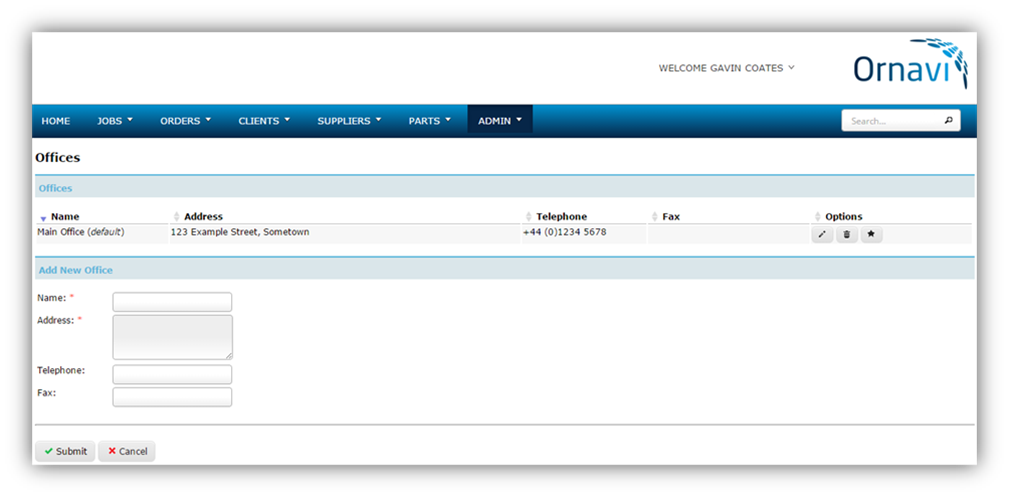
Every new Ornavi account has a default office called “Main Office”. If you have configured your company details in the Company Settings page, you will see the address, telephone and fax has been automatically copied. To edit these, or rename the default office, click on the Edit icon on the right hand side under Options.
Add an Office
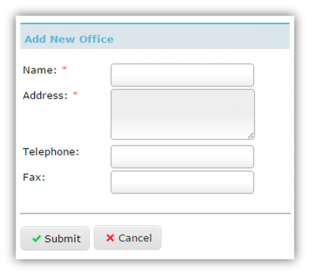
To add or amend an existing office open the Admin menu and click Offices.
Then simply fill out the required fields and click Submit and you will see the new office appear in the Offices list above.
Default Office
Every job created within Ornavi must be tied to an office. If you have created multiple offices within your account, you will see a drop down list containing all offices when creating a job. You can choose which office the drop down list will default to by clicking on the Default Icon (shaped like a star) next to the correct office in the Office settings page.
Deleting an Office
Offices can be deleted by pressing the delete icon. Any jobs that have been created under that office previously will continue to be tied to it but it cannot be used for any jobs created in the future.
Document Templates
Ornavi can generate a number of documents such as Quotes, Purchase Orders and Invoices. Before you can do this you must first tell Ornavi how you would like your document to be laid out using a template – you will only need to do this once for each document type. You will find Document Templates in the Admin Tab, under System Settings.
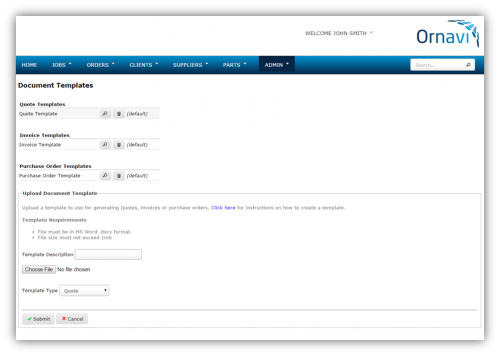
You will see a default template has been added for each Document type. You can either open and edit the default template to suit or you can create a brand new template from scratch. We will explain how to do both.
Edit Default Template
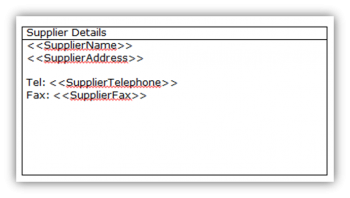
Open a Default Template by clicking on the Magnifying Glass Icon. The document will open in Microsoft Word. You will then see a basic layout for the document and a number placeholders (e.g. <<Title>>). A placeholder acts as a unique flag that the system identifies and replaces with the corresponding text every time you generate a new document. For example every purchase order created in the system has an Order number. If you use the <<OrderNumber>> placeholder, when you generate the PO document it will replace that placeholder with the correct order number.
From here you can edit the template to suit. We recommend starting by replacing the YOUR LOGO HERE image with your own company logo. Moving the placeholders is simple; simply copy and paste the entire placeholder into its new location. There is a full list of the available placeholders for each document type below.
Edit an Existing Template
 If you already have a template that your company uses, you can simply add the placeholders and then upload it into Ornavi. Just copy and paste the placeholders to where you would like the corresponding information to show.
There is a full list of the available placeholders for each document type below.
Create a New Template
You can also create a template from scratch if you would prefer. Arrange the document to your liking and then add/replace the text with the relevant placeholders. There is a full list of the available placeholders for each document type below.
Available Placeholders
A placeholder acts as a unique flag that the system identifies and replaces with the corresponding text. For example every purchase order created in the system has an Order number. If you use the <<OrderNumber>> placeholder, when you generate the PO document it will replace that placeholder with the correct order number.
All available placeholders for each customisable document are listed in the table below.
| Quote | Invoice | Purchase Order | |
| <<ClientPointOfContact>> | <<PartItemNoRow>> | <<CompanyAddress>> | <<OrderNumber>> |
| <<ClientName>> | <<PartDescriptionRow>> | <<DateIssued>> | <<JobID>> |
| <<ClientTelephonePreferred>> | <<PartQuantityRow>> | <<InvoiceID>> | <<AccountNumber>> |
| <<ClientTelephoneOther>> | <<PartUnitRow>> | <<ClientAddress>> | <<DateOrderPlaced>> |
| <<ClientFax>> | <<PartSupplierRow>> | <<JobID>> | <<ForecastDeliveryDate>> |
| <<ClientEmail>> | <<PartCodeRow>> | <<PaymentTerms>> | <<OrderPlacedBy>> |
| <<ClientAddress1>> | <<PartNetCostRow>> | <<InvoiceItemTable>> | <<DeliveryAddress>> |
| <<ClientAddress2>> | <<PartDiscountPercentRow>> | <<VATRate>> | <<SupplierName>> |
| <<ClientTown>> | <<PartMarkupPercentRow>> | <<VATAmount>> | <<SupplierAddress>> |
| <<ClientCounty>> | <<PartUnitCostRow>> | <<NETAmount>> | <<SupplierTelephone>> |
| <<ClientPostcode>> | <<PartTotalCostRow>> | <<Total>> | <<SupplierFax>> |
| <<ClientCountry>> | <<PartsTotal>> | <<PONumber>> | <<PurchaseOrderItems>> |
| <<JobID>> | <<TaskItemNoRow>> | <<DatePaid>> | <<Notes>> |
| <<JobTitle>> | <<TaskDescriptionRow>> | <<DateDue>> | <<OrderType>> |
| <<JobStatus>> | <<TaskLabourGroupRow>> | <<JobTitle>> | <<JobTitle>> |
| <<QuoteTitle>> | <<TaskChargeRateNameRow>> | <<ClientName>> | <<DateOrderCompleted>> |
| <<QuoteDescription>> | <<TaskChargeRateRateRow>> | <<Notes>> | <<OrderCancelled>> |
| <<QuoteCreatedBy>> | <<TaskDescriptionRow>> | <<InvoiceTitle>> | <<PurchaseOrderItemsTable>> |
| <<QuoteDate>> | <<TaskHoursRow>> | <<InvoiceItemsTable>> | <<PODescriptionRow>> |
| <<QuoteTotalCost>> | <<TaskRateRow>> | <<InvoiceItemNoRow>> | <<POItemNoRow>> |
| <<QuoteVATRate>> | <<TaskTotalCostRow>> | <<InvoiceQuantityRow>> | <<POQuantityRow>> |
| <<QuoteVATAmount>> | <<TasksCostTotal>> | <<InvoiceDescriptionRow>> | <<PODescriptionRow>> |
| <<QuoteTotalCostWithVAT>> | <<TasksHoursTotal>> | <<InvoiceAmountRow>> | <<POItemCodeRow>> |
| <<SheetTemplate>> | <<ExpenseItemNoRow>> | <<POItemUnitRow>> | |
| <<SheetName>> | <<ExpenseDescriptionRow>> | <<POItemInvoicedRow>> | |
| <<SheetDescription>> | <<ExpenseQuantityRow>> | <<POItemReceivedRow>> | |
| <<SheetQuantity>> | <<ExpenseCostRow>> | <<POCostPerItemRow>> | |
| <<SheetCost>> | <<ExpenseTotalRow>> | <<POCostAllItemsRow>> | |
| <<SheetTotalCost>> | <<ExpensesTotal>> | <<POTotal>> | |
Upload Document Template
Once you are happy with your template, save it to your PC. Open Ornavi and navigate to the Document Templates page (Admin).
In the upload section click Choose File/Browse and find your saved template.
Give it a Description. This will be it’s display name. E.g. Quote Template. Select which Template Type it is from the drop down then click Submit. If you picked Quote from the drop down you will see the template appear above under the Quote Template heading.
You can create and upload as many templates for each document type as you require. All available templates will be available for selection each time you generate the document but you can make pick a default by clicking the Star icon. This will put the the selected template to the top of the list when choosing a template to generate your document with.
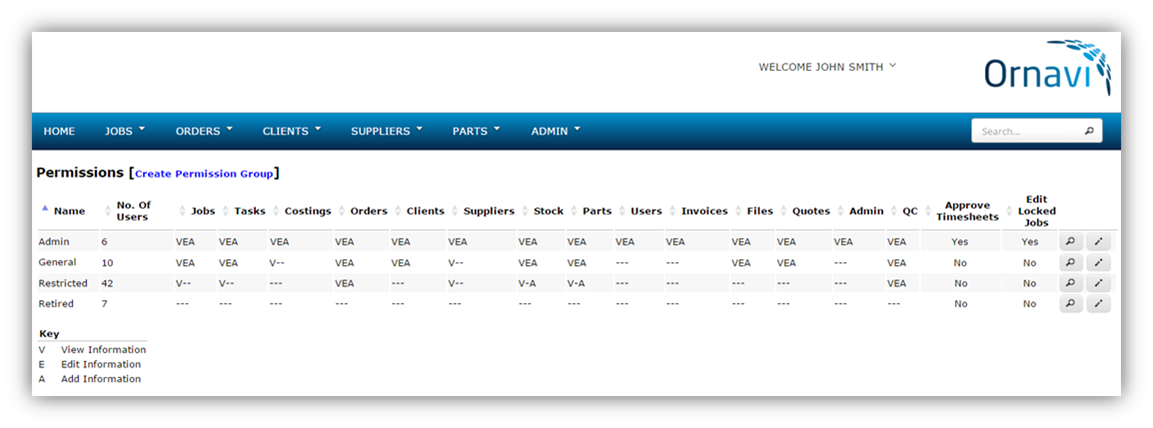
Permissions
Permissions are the security settings within Ornavi that can be configured to control which users have access to which parts of the system. For example, some users will require full access to the system whereas others may only require the ability to view jobs and tasks. There are over 1000 permission combinations within Ornavi.
You can access and adjust Permissions, from the Admin menu.
All new Ornavi accounts have a default permission group called “Admin”. This is automatically set to full access to all elements of the system. We recommend keeping this permission group for all top-level users.
Create a Permission Group
To create a new permission group, open the Permissions page and click [Create Permission Group].
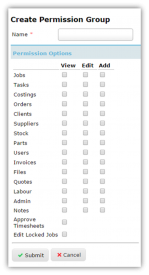 First name the Permission Group. This should describe the type of permissions group it is.
Then tick all the boxes that apply to the group you are creating. The options are View, Edit and Add.
When finished, click Submit. The new Permission Group will now be listed on the main Permissions page.
In order to assign users to a particular Permission Group, first open User Management (from the Admin menu). Click on the required user, click [Edit] and then on the Permissions field you will now see the new Permission Group(s) listed in the drop down. Select the correct option and click submit to save the changes.
Here are some examples of commonly used Permission Groups: